How to ballast track – ballasting the track will go a long way to making your layout more realistic. Unfortunately, it can also play havoc with your points and train running. Additionally it can take a long time. However, with a few simple tips you can get a good finish with minimal time and effort. First,lets prepare the baseboard and get the correct materials. You will need:
- Your choice of ballast
- PVA
- Syringe or eye dropper
- Ex detergent,bottle, spray type.
- Washing up liquid
- large flat brush, 1″
- Black ink for colouring
- Brown acrylic paint for weathered ballast
Preparing the baseboard
To paint or not to paint? It is probably a good idea to paint the baseboard, as this makes it easier for glue to stick. It also prevents the wood getting soaked and warping. Varnish first and then use dark earth paint, around the track areas. You can use cork sheet under the track, although this is not essential. Cork underlay, 4mm cork sheet, for 00,will create a “shoulder” for the ballast and deaden any sound from the trains. It will also make it a lot easier to get track pins in.
Fixing the track
If you have used cork underlay use track pins to hold the track in place. Otherwise use PVA glue. The glue used to fix the ballast will tend to hold the track in place, so use just a few drops of PVA. Make sure that you have good running before you start any ballasting.
Protecting points and moving parts
Cover any points with masking paper and tape. You don’t want water any where near the moving parts or electrics.
Choosing the right ballast – ballast types and colours
There are many manufactures that produce ballast. Woodland scenics make a wide range of colours and grades. However, you can add a little black ink to the glue used to fix gray ballast, to make it more realistic. Additionally, add some green scatter to create weeds. A drop or two of brown acrylic paint will recreate dirty brown ballast.
Finally, The key piece of advise, as with most modelling, is to look at the prototype. I take reference photos of everything! The image below shows the modern type of gray ballast. In this case, it is covering most of the sleepers.

Station areas and goods yards tend to have a dirty brown ballast colour. Ash gets onto the track, close to engine sheds, where it becomes almost black.

At Bolton station the ballast is light brown with a scarcely credible assortment of weeds!

Weeds tend grow in less used areas. Note the plank walkway and points indicator.

In the image below we see some older weathered ballast. The colour is closer to dark brown.

Fixing the ballast – normal track
Medium ballast is recommend for 00 track. It is a little over scale if you look at the prototype, but is a good compromise. The screen grabs below are from the Video series on Everard Junction.
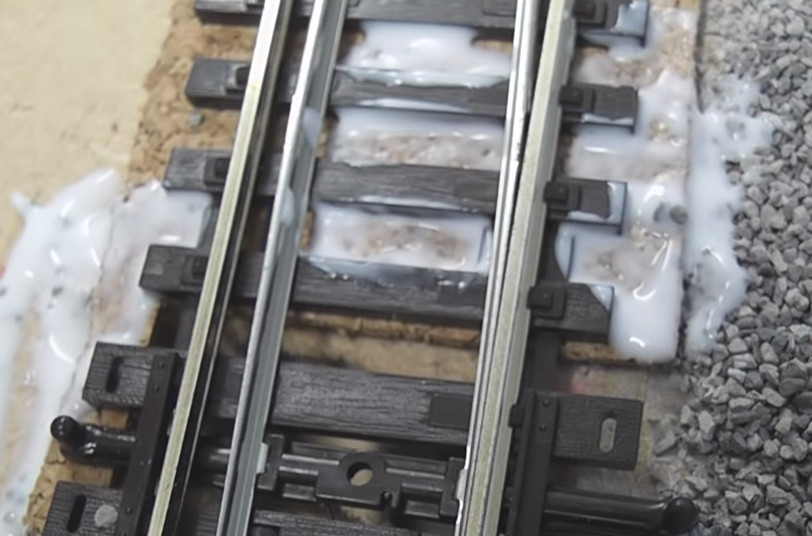
1/ Make a 50 – 50 mix of PVA glue in a jar, then add a drop of washing up liquid. This will help to break the surface tension and allow the glue to flow better. For dirty ballast, add a few drops of black ink.
2/ Shake out the ballst onto the track, you can use a plastic container, like a margarine tub or similar. Spread the ballast out with a paint brush. Brush until the ballast is level with the sleeper tops. If it is not level it will catch on the wheels and cause derailments or poor running. Then, create a shoulder on either side, or follow the underlay.

3/ Wet the track with a spray. make sure that you cover any points with masking tape. You can use an ex detergent “spritser” type of plastic bottle.


Fixing the ballast – points.
Ballasting points is a painstaking process, or is that just a painful process?
1/ Apply neat PVA between each sleeper with a small brush. Keep any glue away from moving parts. Sprinkle the ballast on with your fingers and brush out until level with the sleeper tops.

Wipe any glue that gets onto the point blades off. Throw the points a few times, this will help the ballast to settle.
After 24 hours, vacuum of any excess ballast and remove any that has got into the moving parts or point blades.

If you have enjoyed this post please subscribe.
